RSS Feed

A fantastic-looking recipe from a talented new gluten free blogger. Check it out!

All the Love-- Without the Wheat

When you adapt to a different way of eating which requires you bypass the convenience of processed foods, it’s great to have a few tricks up your sleeve to save you time throughout the week. This cracker recipe is versatile and keeps amazingly well in the fridge, so that you can cut and bake fresh crackers quickly anytime you need them! Here, I often make them fresh for my son’s packed lunch, as well as to accompany soups or main courses, or even just as a filling snack. They are GF and very low-carb, made with almond and coconut flour. I adapted this recipe from one that I posted in April for Cheddar Crackers. I am sure that there are many cheeses that would work well, and I personally look forward to making this with Swiss cheese and herbs!


We were lucky and stumbled on a wheel of good…

View original post 274 more words

How To Make Butter Using a Mixer

20120409-080145.jpg

Good morning!

I am busy doing my last-minute preparations for the Nourished Food Blogger Conference and the Gluten & Allergen Free Expo later this week, but I wanted to post this easy basic how-to on making butter. Now, I realize that I’m not reinventing the wheel here, but my How-To Basic posts seem to consistently be some of the most popular posts.

*NOTE* You can use however much cream that you like. I used about 2 cups of cream, which produced 1 cup butter and 1 cup buttermilk. Also, use cold cream.

20120409-080255.jpg

INGREDIENTS:
Heavy whipping cream, cold
Pinch or two of sea salt to taste, finely ground

DIRECTIONS:
Pour the cream into your stand mixer, and blend on setting 2 (low, above stir) using a flat beater (I used my flex-edge flat beater). Continue stirring for pretty much forever until you are basically ready to give up.
It will finally begin to thicken and resemble sour cream, and then in one magic moment it separates into butter and buttermilk – which prompts you into doing a celebratory dance and then calling every member of your family into the kitchen to view this marvelous thing that you just did.
It takes about thirty minutes of constant stirring to separate and make butter.

Pour the buttermilk into a container with a lid and reserve for another use (I make GF buttermilk pancakes the next morning). Scoop the soft butter into a small dish, and cover.

Enjoy!

In Defense of the Lowly Dandelion

*NOTE: I originally wrote much of this February 26, 2009 as a note on my personal Facebook page. Today just seems like a great day to share it here, with you all. I hope you enjoy it!

WEED. Pronunciation: \ˈwēd\
Function: noun
Date: before 12th century
1 a (1) : a plant that is not valued where it is growing and is usually of vigorous growth; especially : one that tends to overgrow or choke out more desirable plants.
Source: Merriam-Webster

See that? A weed is a plant that is not valued where it is growing. I have a Bluebonnet “weed” that comes up in my driveway every spring, and I love it.

Okay. Dandelions. Ahhh.

20120408-111908.jpg

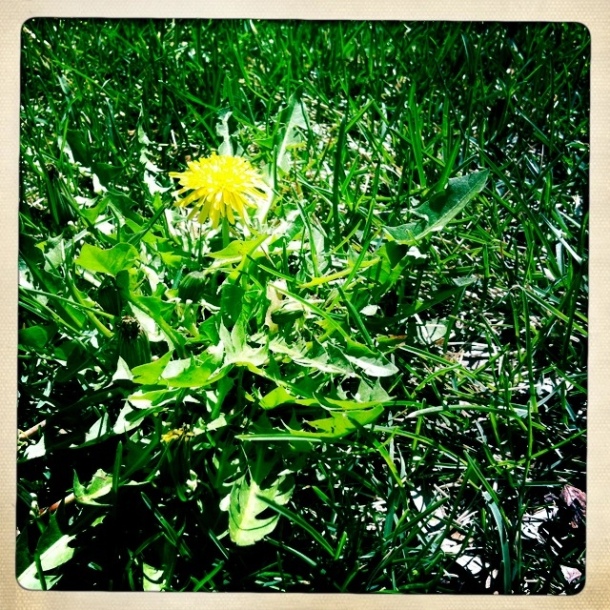
I admit it. I have always had an affinity for the things. I adore dandelions.

When I was a young girl growing up in Great Falls, Montana, a neighbor boy dared me to drink the milk from the stem. I bravely did it, and discovered that I actually liked the earthy natural taste.

I would spend hours in the yard, lying in the grass and braiding them. I would make crowns, necklaces, belts, chains that were taller than I was. When my parents’ yard wasn’t producing the supply I required for my creations, I would scavenge in the neighbors’ yards (they didn’t really seem to mind). I could not understand why so many people seemed to despise this incredibly simple, delicate yet determined, happy little plant.

As I’ve grown older, I have rediscovered my affectionate obsession for the dandelion. After years of growing my own herbs and plants (and all the blood sweat & tears it has taken), it never ceases to amaze me that the dandelion never ceases to show up – unannounced, uncared for and definitely not coddled. It survives the harshest of winters, the most sweltering of summers. It is often among the first things to grow and flower in the early spring, and it multiplies rapidly all through the summer. It always appears cheerfully, inner strength and sheer will simply oozing from it. It is the underdog of the plant family. How could I not fall for it?

20120408-112031.jpg
RAWR. A card my mom framed for me in high school.

The name dandelion comes from the French “Dent de lion” referring to the teeth of the green leaves. The French folk name is “pissenlit” which any of my French-studying friends will know it refers to the plant’s diuretic effects. The medicinal history of the dandelion is quite fascinating. I will not go into detail here, but it has been used extensively in many different cultures all around the world.

All parts of the dandelion are useful and edible. They are bitter, so soaking or blanching first is a good idea. As I mentioned before, it is a strong diuretic. The leaves are best when very young, before flowering occurs. Pick a few and toss them in with your salad greens. You can blanch or steam them first if preferred. Or try dandelion tea! Soaking the young leaves in oil or vinegar will remove much of the bitterness. Young roots can be tossed into a stir fry. I suggest starting slow – they are quite bitter, especially the older they get. The leaves are high in calcium, magnesium, iron, vitamins A and C. Also, a benefit of using it as a diuretic is that dandelions contain high levels of potassium. The flowers, minus all green parts, supposedly make delicious wine. I haven’t tried this one yet – perhaps this summer. In addition to its diuretic properties, it is also used medicinally as a digestive tonic, a laxative, to stimulate liver function, reduce inflammation, relief for urinary disorders, heart weakness, chronic skin complaints. . . In Chinese Traditional medicine it is used to treat breast and lung tumors, mastitis, jaundice and UTIs. Externally it can be used on snakebites. *NOTE* I am obviously not a doctor, and haven’t used it for these complaints. I have found it useful FOR ME with regard to UTIs, however.

*ANOTHER NOTE* I highly recommend getting your dandelions from an organic farmers’ market or your own backyard, IF pesticides have not been sprayed on them. Hopefully this goes without saying.

So, there you have it – my thoughts on this incredible undefeatable little beauty of a plant. How can one hate something so obviously useful and bearing oodles of inner strength and determination? What I haphazardly discovered that warm Montana summer day was a rite of passage I think all children should have the pleasure of experiencing.

Hmmm. . . I think my next tattoo will be a dandelion.

Easter Meringues! Guest Blog Post 2 by Gracefully Gluten Free

One of my favorite things about gluten free & food blogging is the people I come into contact with! I truly cherish the different perspectives and creativity of my blogging peers. One blogger that I am continuously impressed with is Ashley over at Gracefully Gluten Free! I am so excited to share this recipe she created for you here, and even more excited to try this with my kiddos today! I love her tips and hints that will help you attain the perfect meringues!  

You can find her blog here, with lots of great recipes and info on eating out and living gluten free.

Follow her on Twitter here.

Find her on Facebook here.

Follow her on Pinterest here.

Enjoy! 

Easter Meringues by Gracefully Gluten Free

If you are just starting out being gluten-free (or are operating on a limited budget), going out and buying a whole bunch of new ingredients can be daunting, not to mention expensive! Here is a fun little Easter recipe you probably have all of the ingredients on hand for. And if you don’t, everything in this recipe is pretty cheap! We’re talking $7 or less for about 50 “fluff piles.” All of these items should be available from your local grocery store as well. I adapted this recipe from the December 2011 issue of Bon Appetit, but I used coconut flavoring, and I dyed them pastel. Aren’t they cute?

3 egg whites, room temperature
1/8 teaspoon salt
1/3 cup sugar
1/2 cup powdered sugar
1/4 teaspoon coconut extract
food coloring- whatever colors you’d like! I used the “Neon” palette by Kroger. This worked pretty well to make pastels.

ingredients for easter meringues

I’ve said it before, but I’ll say it again (and I’ll probably keep saying it!). The secret to good meringues is to use room temperature egg whites. Really! Those elusive stiff white peaks will form right up! I put my egg whites in a little bowl on the stovetop while my oven pre-heats to speed up the process a bit.

Preheat oven to 200 degrees F.

I also like to clean out my stainless steel bowl with a paper towel dampened with vinegar. The acid helps the peaks to form, and the vinegar also helps to make sure the bowl is really nice and clean (contaminants are usually what ruin meringues).

Using a hand mixer, beat the egg whites and salt together until they get really foamy. This should take about a minute.

Keep mixing, and slowly add the sugar. Mix this until it gets shiny, and stiff peaks form. Then add the powdered sugar and coconut extract, and mix those in as well. It will be sort of moldable at this point.

meringue ready eggs

Spoon about a fourth of the egg whites into a sealable plastic bag. Drip some food coloring in there, and squish it around until it is mixed in. This would be a great step to let kids help with if they are around! You can mix it thoroughly for an even, pastel look, or less for a more “swirly” look. Do this with the other colors in other bags.

Cut one corner off of the bottom of the plastic bag, and squeeze the egg whites out in little swirls onto a baking sheet lined with parchment paper. Put them into the oven for 2-2 1/2 hours. Then take them out, and let them cool for 1 hour. Don’t worry if they are soft when you take them out of the oven, they’ll harden up as they dry.

Store in an airtight container.

And there you have it! Cute, easy, and low-cost! These can be modified for any holiday or occasion. Just change up your flavoring extract and your colors! (For a winter parties this past winter, I used almond extract, kept them white, and put blue sugar on top. I called them snow drifts!)

My 1920s Upright Piano

20120405-082223.jpgWhen I was a girl, I loved to play piano. In elementary school my parents bought a used piano for me to practice on. Found in a newspaper ad at a reasonable price of $250 and kept in someone’s finished basement in Great Falls Montana, I absolutely fell in love with it. I mean, come on. It had been refinished in the 70s in AVOCADO GREEN before I was even BORN. At the time, I recall Mom telling Dad we would strip it and refinish it.

I love older things. They don’t have to be worth much in the views of antique experts to appeal to me – if it’s unique, old, and quirky, I’m bound to at least consider adoring it. Check out a photo of my 64 Streamline here.

We had it professionally tuned for years, and it has moved with us. We learned a bit about it. It was made in 1920. Solid mahogany is underneath the avocado. It can be completely taken apart, piece by heavy piece. L. Ricca & Son in New York provided the warranty. The previous owner said it was originally used as a saloon piano in Montana.

20120405-082935.jpg

My piano teacher was an amazing lady named Leslie. She was very tall, slender in her Lycra leggings and bright tops and colorful heels, with terrifically long nails always painted in fantastic designs. She was so sweet and kind and fun. No piano teacher could hold a candle to her. She came to the house once a week, and I learned to really play on my piano. I played Bach, Beethoven, Christmas music, and Richard Marx, Bryan Adams, Janet Jackson, and more late 80s/early 90s music. I practiced for competitions and performances. It helped me to win a few trophies in elementary and middle school – before my social life intervened and I deemed myself “too busy” to take lessons.

When I got married, it came with me. When my children were born, it used to distract them from whatever they were crying for while they sat on my lap. Later it was pounded on by toddler hands. Then some years passed and the keyboard stayed closed; only recently has it been rediscovered. It gets played from time to time now. At parties, a wedding we hosted here last December, and whenever my kids want me to teach them something on it.

It has never been refinished – by me, I mean. The green is part of its personality. Part of its identity.

I absolutely adore my piano.

Peppered Pork Roast with Rice (slow cooker)

20120404-082936.jpg

I love slow cookers. I love how I can do a bit of prep work, and then my house smells delicious the entire day. Not to mention, of course, that the food turns into fall-apart goodness!

I made this recently before a big storm hit. I’m in Texas, and we have had some pretty big storms lately. We are north of the Dallas area, so no tornadoes; we have seen some pretty amazing powerful weather recently however. I took the photo on the left during a break in a hailstorm (you know, when I should’ve been pulling vehicles in and all) and the right photo shows my husband holding some hail after it had been melting about an hour; he had just arrived home (I’d love to know why he always is out of town when massive storms hit. It totally forces me to be all mature and brave in front of the boys as we sit together and listen to the windows get pummeled by high winds and hail when I’d much rather hide under a blanket).

20120404-084742.jpg

Peppered Pork Steak and Rice

The prep work on Peppered Pork Steak with Rice is minimal. Season the roast generously with salt, garlic powder, and coarse black pepper, then brown it in on the stovetop on every surface. Yep, even the sides! Layer a sliced onion and a sliced apple (minus seeds) in the bottom of your crock pot and then place the roast atop the apple-onion bed. Pour the Tamari sauce over it (gluten free; if you consume gluten, just use regular soy sauce) and then sprinkle the roast with more coarse-ground pepper until it is covered. Add two cups of water to the cooker.

20120404-085858.jpg

Set your slow cooker on LOW for 8 hours. Set a timer to go off in 6 hours. Why? Cause that’s when you’ll add in a cup of rice.
Yes. You can totally cook rice in a slow cooker! As long as you add it in the last two hours or so. I’ve done it with chicken, soups, and more.

I used a rice medley with basmati, brown, white, and wild rices. All you do is add a cupful of the dry rice straight into the cooker – I push the onions and apples to the side first and then stir it in. At this point, those two cups of water have transformed to a nice pork-flavored thin broth. What a marvelous broth to cook the rice in!
If you prefer your rice to have a bit more juice, feel free at this point to add a half cup of hot water to the cooker as well. I didn’t, but I like the rice to be sticky.
Allow this to cook the remaining 2 hours, and serve. Enjoy!

INGREDIENTS:
1 pork roast (size depending on your slow cooker, 3-4 pounds is a good start)
Salt
Coarse ground pepper
Powdered garlic
2 T canola oil (for browning the roast)
1 apple, sliced thin
1 sweet onion, sliced thin
2 T GF Tamari sauce (or other soy sauce – check label for GF)
1 C rice of your choice
2 C water

DIRECTIONS:
Season pork roast.
Brown on all sides in hot skillet using oil.
Place onions and apples in slow cooker.
Top with browned roast.
Add tamari sauce.
Add more pepper to roast if desired.
Add water.
Cook for 6 hours on low.
Add rice to broth.
Cook for 2 more hours on low.
Serve.

Enjoy!
~glutenvygirl

Guest Blog Post 1 – Jagerschnitzel by Gluten Free in Georgia

Hello! 

I am so thrilled to introduce my first guest blogger, Angela over at Gluten Free in Georgia! She is one of my absolute favorite gluten free bloggers – very appealing, easy to read recipes that bring back many of the foods that I miss the most.  I cannot wait to try this unique gluten free recipe she has created for glutenvygirl followers: German Jagerschnitzel. I am so excited to share her post and recipe!
Also, be sure to check out her recipe for German gluten free Black Forest Cake – the perfect accompaniment!

You can subscribe to her (always-fantastic) recipes here.

You can follow her on Facebook here.

Also, check out her very interesting children’s book site here.


Jagerschnitzel by Gluten Free in Georgia

Image

I grew up in a military family which meant that we moved around pretty frequently.  Every 2-3 years we would be stationed in another location so this always meant that I got used to being the new kid in school.  One of the most interesting places we were stationed in while I was growing up was Germany.  I still remember how friendly the German people were and I also remember the delicious food.  I still prepare Bratwurst and German potato salad quite often, but this weekend I was craving something I hadn’t had in years….Jagerschnitzel.  Don’t worry if you have trouble pronouncing it, but do yourself a favor and taste it.  I am confident you will declare yourself an honorary German for the day.

Ingredients:

1 lb boneless pork or veal cutlets (if you get pork tenderloin chops just pound them thin)
2 beaten eggs
1/2 c gluten-free bread crumbs
3-4 T canola oil
4 strips of bacon diced
1/2 c yellow onion chopped
8 oz baby bella mushrooms sliced
1 T tomato paste
1/2 c water
1/2 c dry white wine
1/2 tsp smoked paprika
3 stems of fresh thyme with leaves removed
2 T chopped flat leaf parsley
2 T sour cream
salt and freshly ground pepper to taste

Season cutlets with salt and pepper while heating oil in skillet over medium-high heat.  Dredge meat in beaten eggs and then coat evenly with bread crumbs.  Fry for 1-2 minutes on each side until golden brown.  Remove from pan and drain on paper towels.  Keep the meat warm in the oven while you prepare the gravy.  Saute bacon over medium-high heat for 2-3 minutes until starting to brown and then add your onions.  Saute for 2-3 minutes more and then add tomato paste and mushrooms.  Saute over low heat until mushrooms become tender and then add wine.  Cook for 2 minutes and then add water and seasonings.  Simmer gravy for 5 minutes and then stir in the sour cream.  Spoon over your cutlets.  I served mine with gluten-free spaetzle and German red cabbage.

Texas Bluebonnets

20120401-202006.jpg

Breaded fried fish with mushrooms – gluten free

20120330-195442.jpg

I need to go grocery shopping. In a bad bad way. Tonight, I just experimented a bit with what I had on hand and created this recipe. Nothing sparks creativity like necessity, right?

Using small tilapia filets dipped in melted butter, breaded with gluten free bread crumbs and seasonings, and topped with sautéed chopped mushrooms, this was relatively easy to throw together for dinner tonight. It was also delicious, so I am sharing.

*NOTE: if you don’t like tilapia, sub another fish. If you don’t like fish, try thinly pounded chicken cutlets.

20120330-200233.jpg

Fish, seasonings and GF bread crumbs, mushrooms with tomato and cheese, and the breaded fish.

Combine seasonings with GF bread crumbs. Dip the filets in the melted butter, and then coat them with the seasoned bread crumb mix. In a heavy-bottomed skillet, heat two tablespoons of oil over medium-high heat. When hot, gently place fish in the skillet. Fry for a few minutes and then carefully flip filets over to cook for a few more minutes on the other side. The coating should nicely brown up.

20120330-201219.jpg

Meanwhile, over medium heat in another skillet add chopped mushrooms, chopped tomato, and butter. Cook, stirring occasionally.
Remove fish from pan and let rest on a plate. Add two cloves of minced garlic to the mushrooms, along with a pinch of salt. Cook for a few minutes, until the garlic is nice and fragrant. Spoon the mushroom mixture atop the fish, and then add some of the shredded cheese. Serve with sides of your choice. I served it with some baked spaghetti squash and sauce.

The ingredients and measurements are as follows:

4 small tilapia filets
6 T + 2 T butter (6 for the dip, 2 for the mushrooms)
1 C gluten free bread crumbs
1 tsp garlic powder
1 tsp oregano
1 tsp salt
1 tsp pepper
1 tsp smoked paprika
4 oz button mushrooms, chopped
1 Roma tomato, chopped and seeded
2 garlic cloves, minced
About 1/2 C white cheddar (or cheese of your choice), shredded

Enjoy!
~glutenvygirl